
How to Watch FIFA World Cup 2026 in Bali with Telkomsel MAXStream
Watching FIFA World Cup 2026 in Bali is easy with Telkomsel MAXStream. BaliEasy can help you set it up. There
Follow these simple steps to order and activate your Telkomsel eSIM with BaliEasy for seamless connectivity during your stay in Bali.
Start by selecting the data package that fits your needs. BaliEasy offers various eSIM packages tailored for tourists. Select the one that suits your data usage and click Buy Now.
Choose your Telkomsel eSIM By BaliEasy package here.
After selecting your plan, you’ll need to enter your personal details, including:
Once you’ve filled in your information, proceed with the payment.
Once your payment is processed, you’ll receive two important emails from BaliEasy:
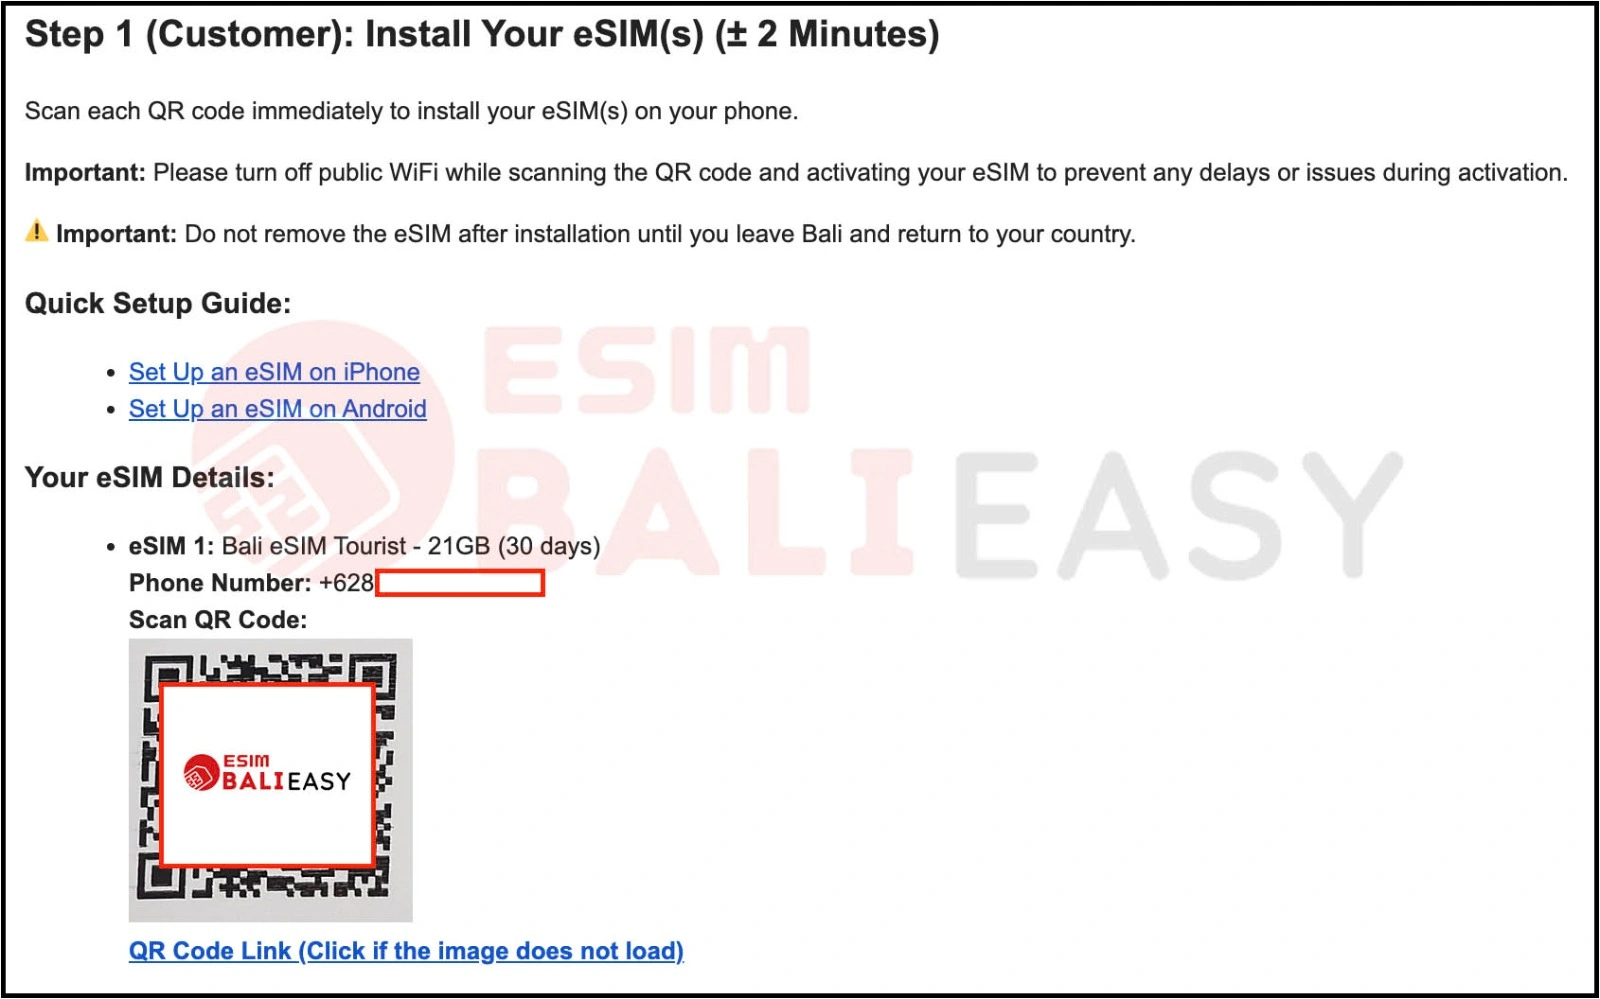
Important Tip: Avoid scanning the QR code while connected to public WiFi. This ensures that there are no issues during the installation.
Don’t Remove the eSIM: Once installed, keep the eSIM on your phone until you leave Bali and return to your country. Removing it prematurely may cause network issues.
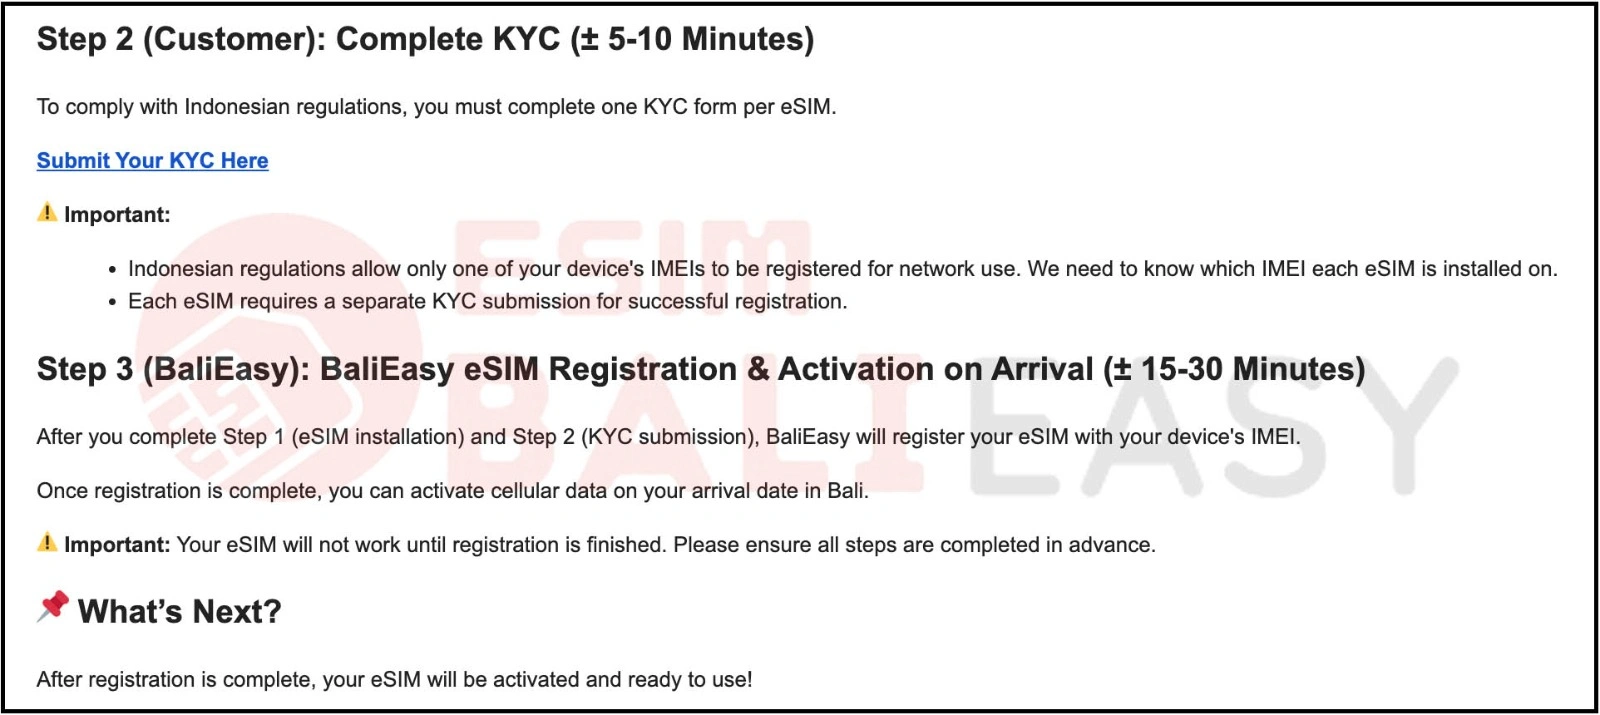
To complete your eSIM registration with the Indonesian network, click the KYC form provided in your eSIM QR code email. You will be asked to submit:
Why IMEI Registration is Important:
Since 2022, Indonesia requires all foreign phones to register their IMEI with the local network provider, such as Telkomsel, for proper connectivity.
For more information on this, check out our guide on Registering Your IMEI in Indonesia.
Once you have installed your eSIM and completed the KYC form, BaliEasy will register your eSIM with Telkomsel. Your eSIM will not work until registration is complete, but once it’s processed, you can enjoy seamless data and calls upon arrival in Bali.
If you need assistance with your eSIM or have any questions, feel free to get in touch with us.
Email: esim@balieasy.com
WhatsApp: +6281 365 626 111
Watching FIFA World Cup 2026 in Bali is easy with Telkomsel MAXStream. BaliEasy can help you set it up. There
Good news for Telkomsel SIMPATI users. After registering your Telkomsel SIMPATI eSIM or SIM card, you can claim the Bola
Discount Applied Successfully!
Your savings have been added to the cart.